
🌿 Winter Reset: Pruning Your Elderberries for a Strong Spring
- Feb 21
- 3 min read
It’s elderberry haircut season, and we’re not shy about it. Snip, snip — off go the tired old canes, making room for the fresh, berry‑loaded growth that’s coming. Elderberries have been treasured for generations — not just for their deep, earthy flavor, but for their long history of supporting wellness through the colder months. They’re one of those plants that feel like a bridge between the garden and the apothecary.
Why Elderberries Need a Hard Reset
Elderberries fruit on first‑year wood, which means the branches that grew last season are the ones that will carry berries this summer. Older canes become woody, unproductive, and more prone to disease. Clearing them out keeps your plants vigorous, balanced, and ready to put their energy where it matters: new growth and big clusters.
When to Prune
Late winter is the sweet spot — after the deepest cold has passed but before the buds swell. Here in the Ozarks, that usually means January through early March, depending on the weather.
How to Prune (Simple + Doable)
Remove all dead, damaged, or diseased canes
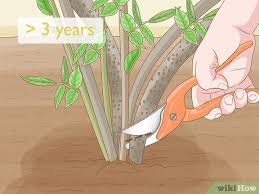
Cut out the oldest, thickest canes (about ⅓ of the plant)
Leave 6–8 strong young canes for this year’s fruit
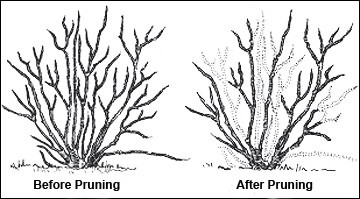
Trim remaining canes to 3–5 feet to encourage branching
Keep the base open for airflow and sunlight
A well‑pruned elderberry looks a little bare now, but by midsummer it will be lush, green, and heavy with umbels.
Optional: A Full Rejuvenation Cut
If your bushes are overgrown or haven’t been pruned in years, you can take them down to 6–12 inches. You’ll skip a year of berries, but the plant will come back stronger and more productive.
🌱 Starting New Elderberry Bushes From Your Prunings
One of the best parts of elderberry season is that every pruning session gives you the chance to grow more plants. Elderberries root incredibly well from hardwood cuttings, which means those clipped canes can become next year’s bushes with just a little intention.
What Kind of Cuttings to Use
Choose canes that are:
From last year’s growth (firm but not brittle)
About the thickness of a pencil
Healthy, disease‑free, and not overly woody
Each cutting should be 8–10 inches long with 2–4 nodes (the little bumps where leaves and roots form).
Cutting Angle vs. Straight Cut
Bottom cut: Make this one at an angle.This helps you remember which end goes into the soil and increases the surface area for rooting.
Top cut: Make this one straight across.It signals “this is the top” and reduces moisture loss.
This simple angled‑bottom/flat‑top method keeps everything clear and prevents upside‑down planting — which elderberries will not forgive.

How to Root Elderberry Cuttings
Trim your cutting (angled bottom, straight top).
Remove any buds that would sit below soil level.
Dip the bottom in rooting hormone (optional but helpful).
Plant 2–3 nodes deep in a pot or directly in the ground.
Firm the soil around the cutting so it stays upright.
Water well and keep the soil consistently moist.
Place in bright, indirect light if potted; outdoors is fine if temps are above freezing.
Elderberries root quickly — you’ll usually see new leaf growth in early spring and a fully established young plant by summer!
When to Transplant
If you start them in pots, move them to their permanent home:
After the last frost
Once roots are well‑developed and the cutting is pushing strong new growth
Why This Season Matters
Pruning is more than a chore — it’s a promise. Every cane you clear makes room for the berries that will fill your jars, stock your pantry, and support your family and community through the year. If you’re restarting your own patch, we’d love to see it. Reply to this email or tag us — your elderberries might inspire someone else to plant their first row


Comments